Overview
PERFORM
PATCH
OSC
FILTER
ENV
LFO
MOD
FX
Obsidian is a versatile and efficient 32 voice polyphonic keyboard synthesizer which is capable of both synthesis and sample playback, including multisamples.
| |
Quick links: Overview PERFORM PATCH OSC FILTER ENV LFO MOD FX |
Each of the synth's voices has 3 independent oscillators which may use one of 7 different synthesis methods. The outputs of the 3 oscillators are mixed together and passed through the voice's dual filters, which may be configured in series, parallel or as a stereo pair.
The voices' outputs are mixed together and passed through a global stereo filter before being sent to the synth's effects section. The effects section contains Multi-FX, Delay and Reverb insert FX which may be arranged in any order.
The synth has 5 Envelopes and 5 LFOs which may be used to modulate nearly any parameter of the synth. Modulation connections are configured using the MOD list. Only the amplitude envelope has a fixed modulation connection, which is dedicated to controlling the volume level and lifetime of the synth's voice.
Obsidian's combined control settings (the ones which determine the type of sound it makes) are known as a patch (also known as a preset in other apps). The term patch comes from the heyday of analog synths when sounds were made by routing (or patching) wires through a patchbay.
Patches may be viewed and managed using the PATCH page. Obsidian automatically maintains a database of all the patches it knows about, which are divided into 3 classes:
 |
User patches are patches you've saved. When saving a user patch you can add tag attributes to describe it, which may be used later to find the type of sound you want. If you wish, you may save a special user patch named Default which the synth will automatically load when it is created. |
 |
Factory patches come as part of the app. They are read-only, but you're free to edit them and save them as user patches. Factory patches come with their tag attributes already set up. |
 |
IAP patches come with some types of in-app purchase. They are read-only, but you're free to edit them and save them as user patches. IAP patches come with their tag attributes already set up. |
If you're not into editing patches then you can take advantage of the 300+ factory patches and operate the synth without needing to leave the PERFORM and PATCH pages.
If you want to go deeper then you can modify an existing patch or build a new one from scratch.
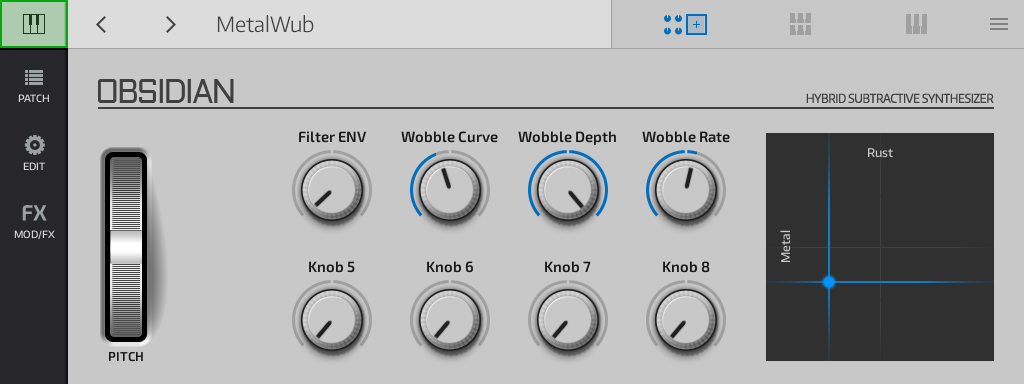
The perform page is accessed by tapping on the PERFORM tab button (highlighted in GREEN in the image below).
Use the LEFT/RIGHT ARROWS on the left of the title bar to browse patches as you play. The patches available are filtered according to the bank, tag attributes and search text currently set in the PATCH page.
Use the VIEW BUTTONS on the right of the title bar to select the desired view:
MACROS |
Dedicates the top half of the performance page to the macro controls and the bottom half to the keyboard. When the macro controls are visible, tap the HAMBURGER BUTTON in the top right corner of the perform page to invoke the Macro Tools menu. |
|
DUAL KEYS |
Shows two keyboards. | |
FULL KEYS |
Dedicates the entire performance page to a single large keyboard. |
You can access settings for the keyboard by tapping on the button highlighted in GREEN in the image below.

Use the bar to lock or unlock HORIZONTAL SCROLLING or to set the keyboard's TRANSPOSE, VELOCITY or SCALE.
Any settings you change via the bar are applied globally to all keyboard-based instruments in the project.
You can change the width of the keys in the Settings page.

The perform page has 10 macro controls, consisting of 8 rotary knobs and 2 X/Y pad axes.
When the macro controls are visible, tap the HAMBURGER BUTTON in the top right corner of the perform page to invoke the Macro Tools menu.
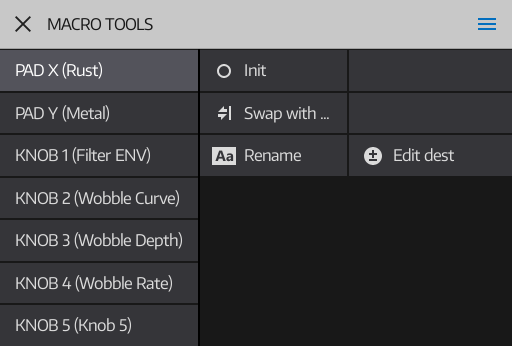 |
Use the menu to initialize, swap or rename macro controls, or to map them to a modulation destination. |
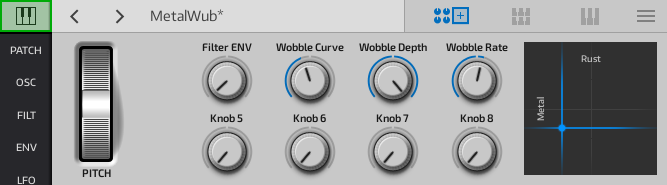
The patch page is accessed by tapping on the PATCH tab button (highlighted in GREEN in the image below).
It provides the following features:
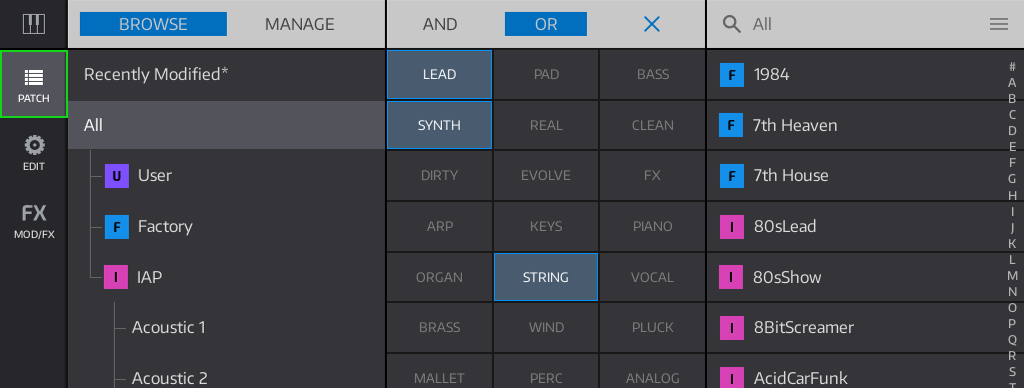

The page is divided into a Bank List, a Tag Attribute List and a Patch List.
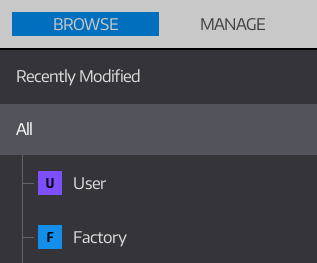 |
BROWSE MODE Selects the bank you'd like to browse. You can browse all the patches in the database by selecting All, or narrow your search down by selecting a lower level bank folder. Use the Recently Modified category to view patches you've recently modified but not explicitly saved. |
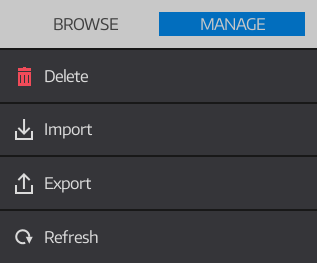 |
MANAGE MODE Use this mode to manage your user patches. When MANAGE is selected, the patch list allows multiple selection so that you can easily perform bulk operations. Obsidian automatically keeps its patch database up to date, but if you think you have some missing patches then you can use the Refresh option to manually rebuild its database. For Import and Export options, see Integration and Sharing. |
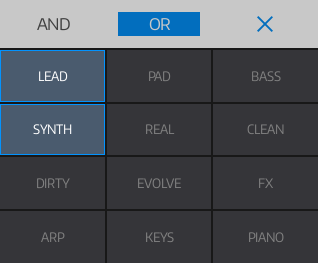 |
Selects the type of sound you'd like to browse according to its tag attributes. When AND mode is selected, the patch must contain all the selected tags in order to be shown. When OR mode is selected, the patch must contain at least one of the selected tags in order to be shown. |
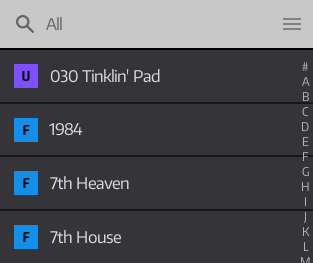 |
Shows a list of the patches which match the currently selected bank and tag attributes. Use the TEXT SEARCH on the title bar to narrow your search. TAP to load a patch. |
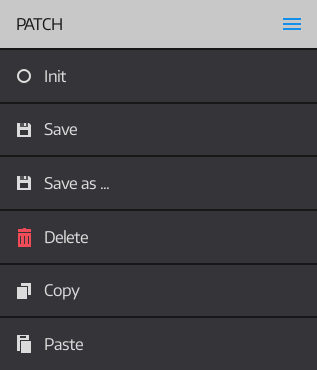 |
TAP THE HAMBURGER BUTTON in the top right corner to open the menu. Use the menu to initialize, save, delete, copy and paste patches. Copy/paste works between other Obsidian synths and across projects. |
The edit page is accessed by tapping on the EDIT tab button (highlighted in GREEN in the image below).
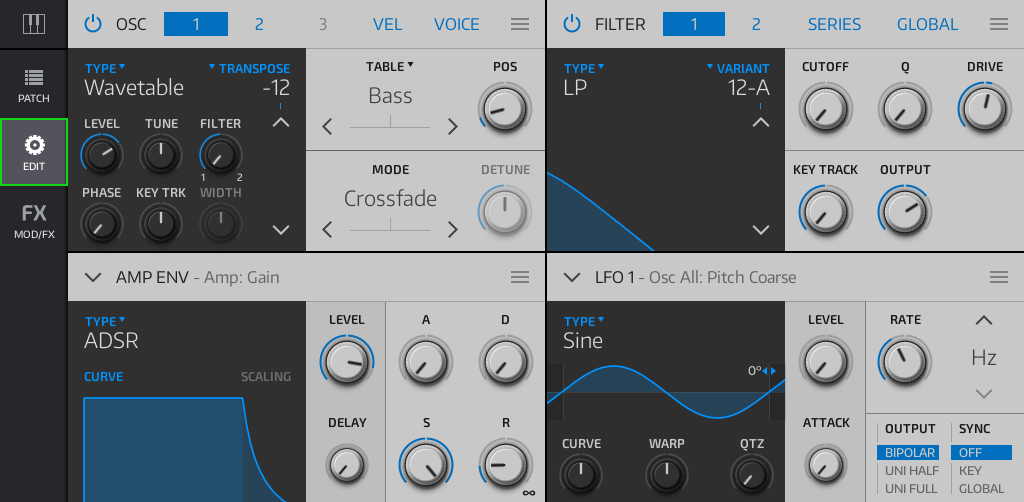
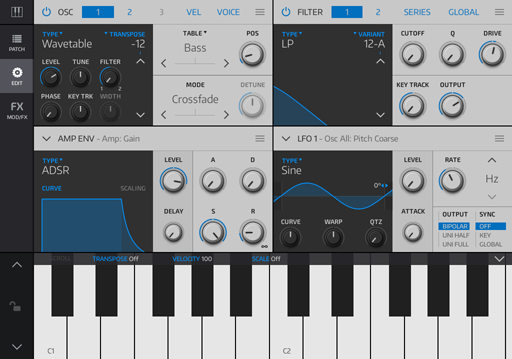
The page is divided into OSCILLATOR, FILTER, ENVELOPE and LFO panels.
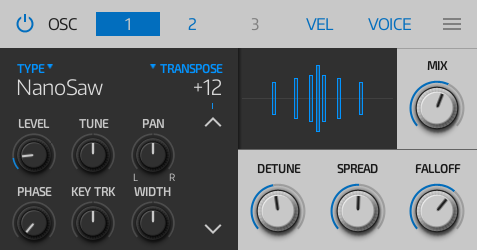 |
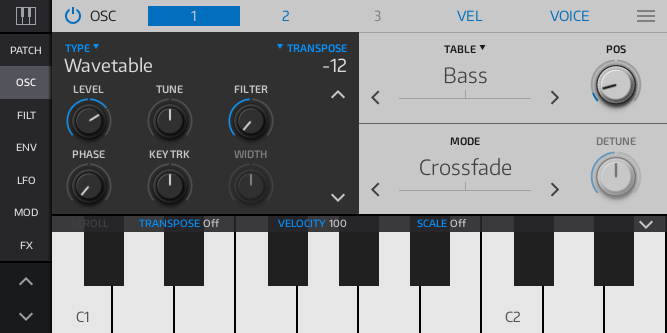
Use the title bar to select the oscillator you wish to edit. The POWER BUTTON enables or disables the currently selected oscillator. The LEFT PANEL is common to all oscillator types. The RIGHT PANEL depends upon the selected oscillator type. |
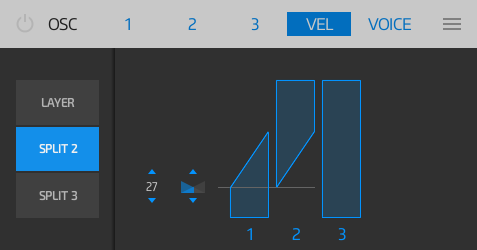 |
Use the VEL title bar item to set how each oscillator responds to note velocity. There are various layer and split modes available, and you can set split points and crossfade regions by dragging vertically on the controls. |
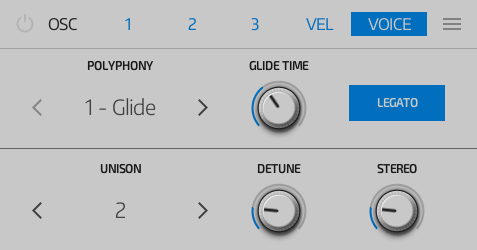 |
Use the VOICE title bar item to control how the synth manages its voices. You can choose between mono and glide modes, or limit the polyphony according to your needs. You can also enable Unison mode, which fattens each note by assigning more than one voice to it. Unison mode will reduce the available polyphony. |
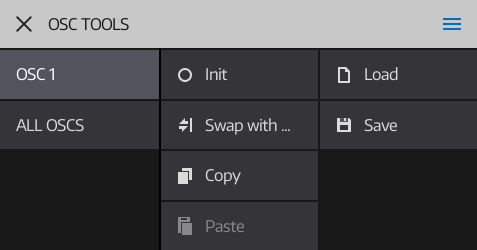 |
TAP THE HAMBURGER BUTTON in the top right corner to open the menu. Use the menu to initialize, save, load, swap, copy or paste filter setups. |
The following oscillator types (synthesis methods) are available:
| Analog | An analog-modelled oscillator with 6 different waveforms, PWM and oscillator sync. |
| Wavetable | Allows morphing between different waveforms from a choice of various wavetables. |
| PD | A Phase Distortion oscillator which provides low-pass and resonant filter-style sounds without the need for an extra filter. |
| FM | A Frequency Modulation oscillator with 3 FM operators. See the FM Oscillator for more details. |
| NanoSaw | Creates multiple layered and detuned sawtooth waveforms. |
| Noise | Produces filtered noise with a choice of different spectral shapes and filtering options. |
| Sample | Plays mono or stereo samples. Up to 24 sample zones may be created across the keyboard range, with optional crossfades. See the Sample Oscillator for more details. |
The FM oscillator has 3 operators which are able to use a range of different waveforms. Any of the operators may be used as carriers (ie. they can can generate audio output) but only operators 1 and 2 can be used as modulators (ie. they're able to modulate the frequency of other operators, including themselves).
The outputs from the carriers (and the connections between them) may be modulated via their own dedicated envelopes or with a modulation connection.
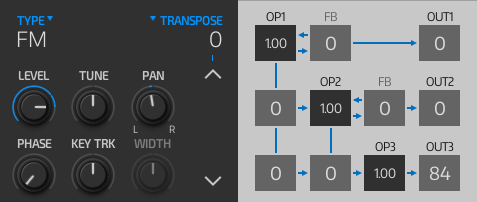 |
FM OPERATOR GRID Operators are represented in BLACK and their connections in GREY. DRAG UP OR DOWN on a cell to make a coarse value adjustments. TAP on a cell to edit its properties. |
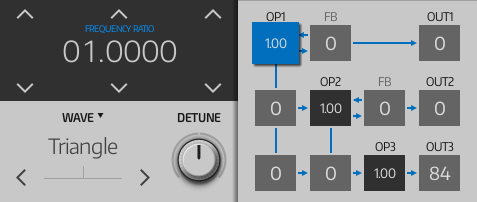 |
OPERATOR PROPERTIES This view is shown when an operator is selected. You can use it to set the operator's waveform, frequency ratio and apply a fixed detune. To use the operator as an LFO, set its RATIO to zero and use DETUNE only. |
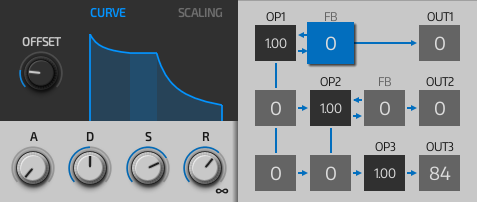 |
CONNECTION PROPERTIES This view is shown when a connection is selected. Use the CURVE view to set the envelope's overall shape. |
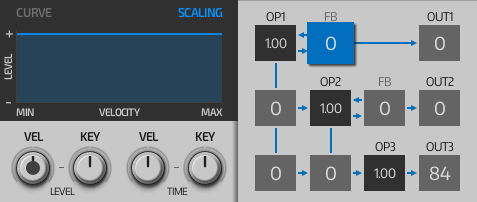 |
Use the SCALING view to set how the envelope's level and time are modified according to the voice's note or velocity. |
The panel's usual hamburger button changes to a tool button when an operator or connection is selected. Tap the tool button to invoke the FM Tools Menu:
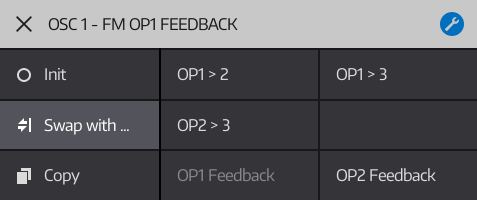 |
The FM Tools Menu provides a number of features to help with initializing, swapping and copying operators and connections. |
The sample oscillator allows you to map one or more samples across the keyboard's range.
Each sample range is known as a zone. If two zones overlap then the sample oscillator will crossfade between them. The sample oscillator won't allow you to overlap more than two zones. If you need to layer more samples then you can always use another sample oscillator.
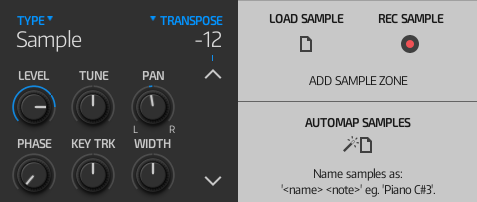 |
This view is shown when no sample is loaded. Use the LOAD SAMPLE or REC SAMPLE buttons to add a new sample which covers the entire note range. Use AUTOMAP SAMPLES to quickly map a set of multisamples. The samples must be named in the format 'Piano A2', 'Piano G#3' etc. |
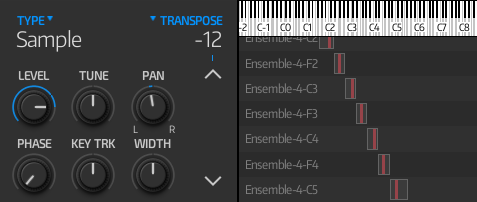 |
This view is shown when one or more samples are loaded. TAP on the keyboard at the top or on a sample row to select a zone. DOUBLE TAP on the keyboard at the top or on a sample row to toggle the zoom level. |
When a sample zone is selected, the left side of the oscillator panel shows its properties:
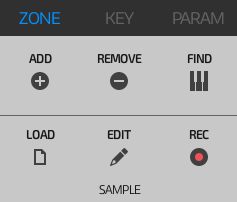 |
ZONE Use the ADD or REMOVE buttons to add or remove a zone. Use the LOAD, EDIT and REC buttons to modify the zone's sample. To quickly locate the zone used by a particular note, tap the FIND button and then tap a note on the instrument's main keyboard. |
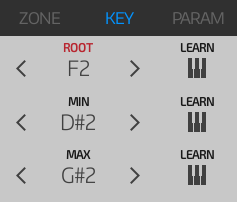 |
KEY The ROOT control sets the root note of the sample (the note that the sample was originally recorded in). Alternatively, this can be used to give the sample a different pitch. The MIN and MAX controls set the range of notes that the sample zone responds to. To quickly set a key, tap the LEARN button and then tap a note on the instrument's main keyboard. |
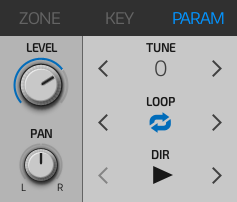 |
PARAM Use this page to set the general parameters for the zone, such as its volume, pan, fine tuning, loop type and direction. As well as the traditional sample loop modes, the sample oscillator supports a unique SPECTRAL LOOP MODE. This creates a new sample based upon the spectral characteristics of the original sample. It works best with melodic samples - also try it out with the voice filter set to stereo mode. |
The panel's usual hamburger button changes to a tool button when a sample zone is selected. Tap the tool button to invoke the Sample Tools Menu:
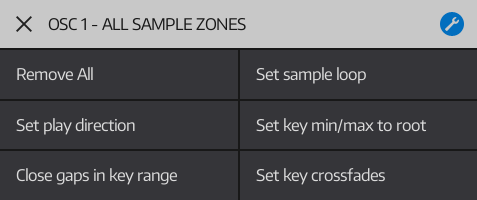 |
The Sample Tools Menu provides a number of features to help with mapping samples and setting properties for all zones using a single operation. |
Each voice has 2 filters which may be configured in series, parallel or as a stereo pair. There is also a single stereo global filter which is applied to the mix of all voices before they are sent to the synth's effects.
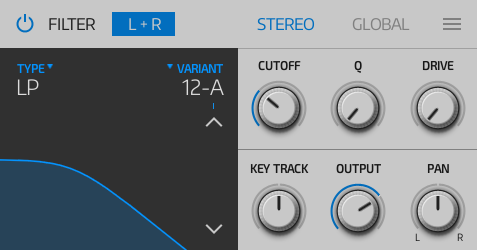 |
The POWER BUTTON enables or disables the currently selected filter. Some filter controls may not be available, depending upon the type of filter selected. |
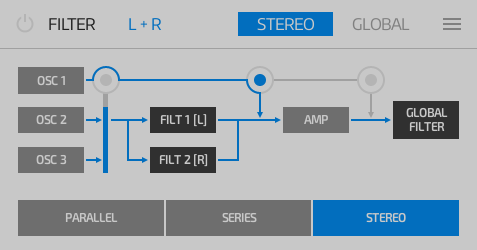 |
Use the filter routing panel to set the filter configuration. Oscillator 1 may optionally bypass the voice filters or amplitude envelope. |
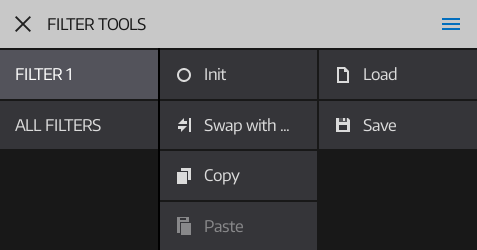 |
TAP THE HAMBURGER BUTTON in the top right corner to open the menu. Use the menu to initialize, save, load, swap, copy or paste filter setups. |
Each voice has 5 envelopes which may be used to modulate nearly any parameter of the synth. Modulation connections can be made using the MOD list or the rapid connection method. However, the amplitude envelope has a fixed modulation connection which is dedicated to controlling the volume level and lifetime of the synth's voice.
Envelopes may be configured as traditional ADSR (attack/decay/sustain/release), simple AD (attack/decay, frequently used for drums), or Bipolar (positive/negative output, frequently used for controlling pitch).
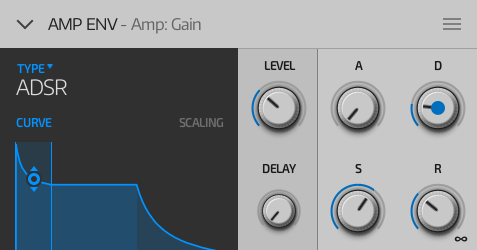 |
CURVE Use the CURVE view to set the envelope's overall shape. |
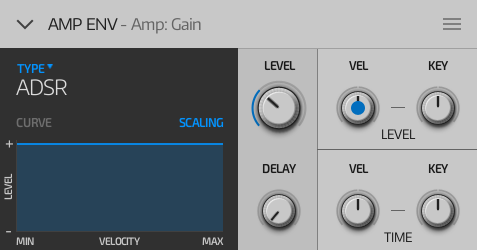 |
SCALING Use the SCALING view to set how the envelope's level and time are modified according to the voice's note or velocity. |
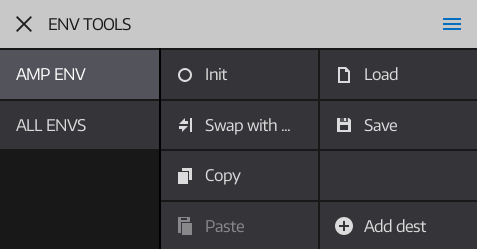 |
TAP THE HAMBURGER BUTTON in the top right corner to open the menu. Use the menu to initialize, save, load, swap, copy or paste envelope setups and add/remove modulation destinations. |
Each voice has 5 LFOs (Low Frequency Oscillators) which may be used to modulate nearly any parameter of the synth. Modulation connections can be made using the MOD list or the rapid connection method. Each LFO's cycle period may be set in terms of frequency or beat intervals.
The following LFO types are available. Each type may be modified via the CURVE, WARP and QUANTIZE controls.
| Sine | Simple sine wave. |
| Square | Simple square wave. |
| Triangle | Simple triangle wave. |
| Saw Up/Down | Simple sawtooth wave. |
| Saw Double | Double sawtooth, where the second sawtooth may be offset to create a swing effect. |
| FM | Free-running single operator Frequency Modulated wave. |
| FM Sync | As FM, but each cycle is reset at the start of the LFO's cycle rather than being allowed to free-run. |
| Random | Random (sample and hold) with step or ramp options. |
| Random Loop | As Random, but the sequence of values is fixed to create a repeating loop. |
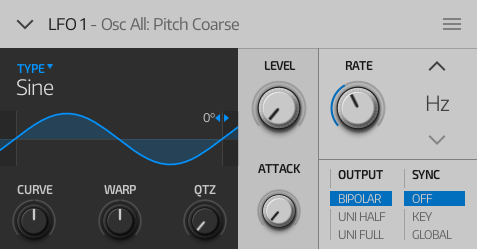 |
DRAG LEFT OR RIGHT on the waveform to modify its time offset. RATE - Tap on the UP ARROW to set the rate in terms of beat intervals. OUTPUT - Determines the LFO's output value offset. SYNC - Synchronizes the waveform's start to the note or the song. |
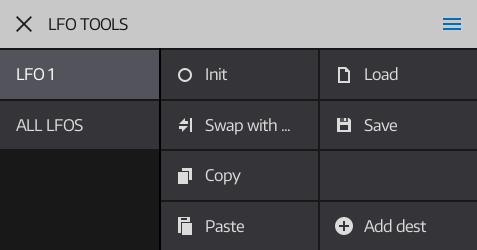 |
TAP THE HAMBURGER BUTTON in the top right corner to open the menu. Use the menu to initialize, save, load, swap, copy or paste LFO setups and add/remove modulation destinations. |
The MOD/FX page is accessed by tapping on the MOD/FX tab button (highlighted in GREEN in the image below).
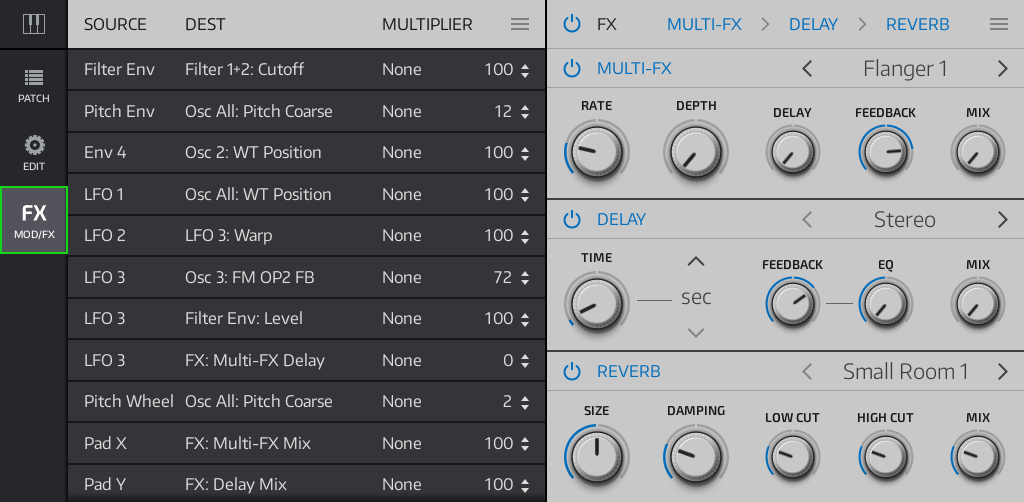
The MOD/FX page is divided into the MOD list and the FX panel.
This shows a list of all the modulation connections in use by the patch.
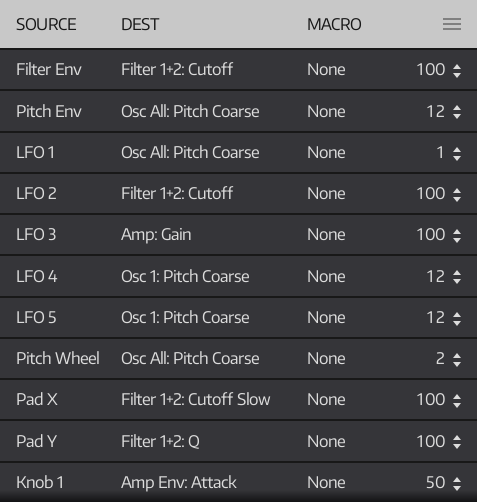 |
TAP on any connection in the list to modify its properties or to remove the connection. Each connection has the following properties: Source - The connection's origin, such as an envelope, LFO or macro control. Destination - The parameter controlled by the connection, such as an oscillator or filter control. Multiplier - Optionally defines a macro control which scales the connection's value. Depth - Determines the amount of modulation the connection applies to its destination control. |
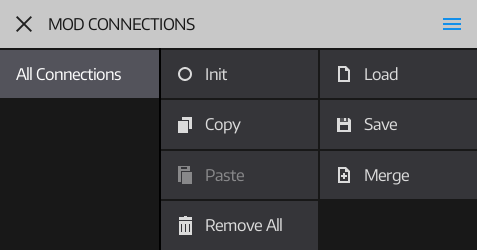 |
TAP THE HAMBURGER BUTTON in the top right corner to open the menu. Use the menu to initialize, save, delete, merge, copy and paste modulation setups. |
Although the MOD list can be used to add and remove modulation connections, there's a faster way to add or remove common connections from macro controllers, envelopes and LFOs.
To illustrate the process, here's an example of how to connect an LFO output to a filter cutoff control:
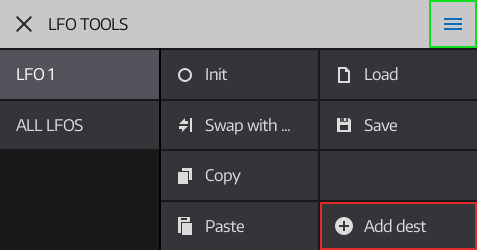 |
Navigate to the LFO and tap on its hamburger button (highlighted in GREEN). Tap on the Add Dest item (highlighted in RED. Note: If the LFO already has a connection, this item will be labelled Edit dest. |
Once you have done this you will see a message prompt in the lower part of the instrument:

Navigate to the FILTER, find the CUTOFF control and tap on the circular plus icon to create the connection:

Once the voice outputs have been mixed together, they are passed through the global stereo filter and sent to the synth's effects section.
 |
TITLE BAR: Tap the POWER BUTTON to bypass the entire effect chain. TAP AND HOLD on an effect's name in the title bar and DRAG HORIZONTALLY to change its order in the chain. EFFECTS: The effects section contains Multi-FX, Delay and Algoverb units. These are simplified versions of the effects detailed in the Effects Section. |
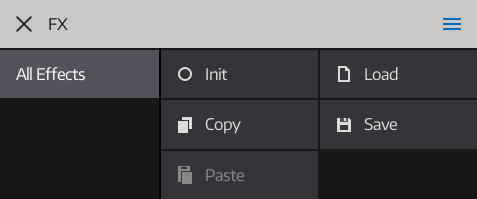 |
TAP THE HAMBURGER BUTTON in the top right corner to open the menu. Use the menu to initialize, save, load, copy or paste effect setups. |