Status Bar
Time Ribbon
Recording
Editing Window
Command Buttons
Grid Units
NanoStudio's sample editor is capable of efficiently editing mono or stereo samples of up to 2 hours in length. It supports most audio file formats such as wav, aiff, ogg, m4a and mp3 and can handle all common bit depths and sample rates.
NOTE: MWAV is a proprietary read-only audio format used by NanoStudio to encode multisampled instruments and cannot be edited by the sample editor.
| |
Quick links: Status Bar Time Ribbon Recording Editing Window Command Buttons Grid Units |
The sample editor's status bar is similar to the app's main Status Bar but also has a number of differences specific to the sample editor.

CLOSE BUTTON |
Closes the sample editor. If you have made edits to the sample, you will be offered the option of discarding those edits or saving them in a format of your choice. | |
UNDO/REDO |
The sample editor uses its own history buffer which is independent to the app's main history. TAP AND HOLD to show the complete list of operations currently held in the sample editor's history buffer. |
|
SAMPLE POSITION INDICATOR |
Indicates the player's current position and grid units. TAP to change the grid units via the Grid Units Dropdown. |
|
STOP/LOCATE |
Stops the sample player. When the sample player is stopped: TAP locates the player to the start of the current loop. DOUBLE TAP locates the player to the start of the sample. |
|
LOOP |
TAP to toggle the sample player's loop mode on or off. | |
PLAY |
Starts the sample player. When loop mode is enabled, the circular icon indicates the current position in the loop region. | |
RECORD |
TAP to show the Sample Record Dropdown. |
The grid units dropdown is invoked by tapping on the status bar's sample position indicator.
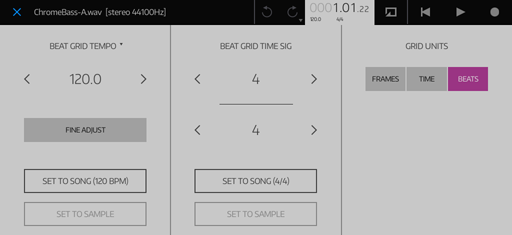 |
Use the dropdown to choose the sample editor's grid time units. For BEAT units, you must also set the tempo and time signature the sample editor should use. |
| GRID UNITS | Choose between sample FRAMES, TIME (hrs:min:sec) or BEATS. If you select BEATS then you must also specify the tempo and time signature of the sample. |
| TEMPO AND TIME SIG | These controls are only available when the GRID UNITS are set to BEATS. Their operation is the same as the controls detailed in the PLAY Settings. The additional buttons allow you to set the tempo or time signature to match the song or the sample currently being edited. If the sample does not have embedded tempo/time sig information then some of these buttons may not be available. |
The sample record dropdown is invoked by tapping on the status bar's record button.
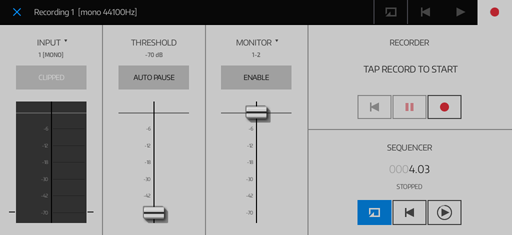 |
Use the dropdown to record from your device's built-in microphone or an external hardware audio device. TAP THE CLOSE BUTTON when you have finished a recording session to return to the sample editor. You can use the editor to perform further post-editing on your recording before you save it. |
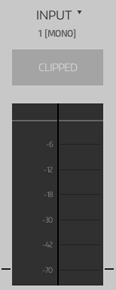 |
RECORDER INPUT SETTINGS TAP ON THE TITLE to choose the input channel(s) you wish to record. The CLIPPED indicator button will light up if the input signal was clipped during the current recording session. TAP ON THE INDICATOR to reset it. The INPUT LEVEL METER shows the current input level. The small horizontal bars on each side indicate the current record start threshold. Note: The input will automatically switch to an Audiobus input source if it detects an app is sending audio to NanoStudio in the active Audiobus session. |
|
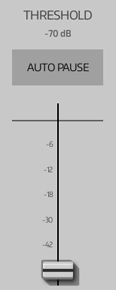 |
RECORDER THRESHOLD SETTINGS The recorder uses the threshold settings to automatically pause or start recording when the input signal passes the threshold level. This helps to reduce the amount of post-editing required when recording material which contains unwanted quiet sections. By default, the recorder only uses the threshold to determine when it should start recording. Enable AUTO PAUSE to make the recorder automatically pause when the input signal goes below the threshold. If you want recording to start immediately, you can disable the threshold by setting the THRESHOLD SLIDER to its minimum value. |
|
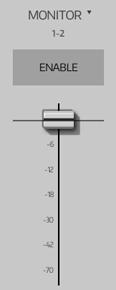 |
RECORDER MONITOR SETTINGS Use the monitor function to listen to the recorder's input signal. WARNING: To avoid feedback, it is recommended that you only enable this function when monitoring via headphones. TAP ON THE TITLE to choose the output channels the monitor signal will be sent to. Use the ENABLE button to enable or disable monitoring. Use the MONITOR LEVEL SLIDER to set the volume of the monitor output signal. |
|
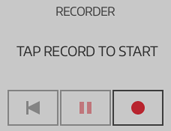 |
RECORDER CONTROLS Tap the RECORD BUTTON to start recording. Recording will not start until the input signal exceeds the threshold. When recording, you can tap the PAUSE BUTTON at any time to temporarily stop recording at the current position. Tap the REWIND button to discard the current recording and start again. |
|
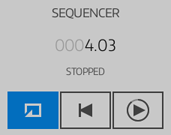 |
SEQUENCER CONTROLS Use these controls to operate the sequencer whilst recording. |
The time ribbon indicates the sample player's current position and the sample loop region.
The grid units may be changed via the Grid Units Dropdown.
TAP on the ribbon to move the sample player to the desired position.
DOUBLE TAP on the ribbon to move the start point of the loop region to the desired position.

LOOP REGION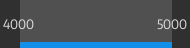 |
Indicates the region of the sample used by the player for looping. The blue bar is shown if looping is enabled using the loop button on the Status Bar. TAP AND HOLD ON THE START / END to drag the loop extents. TAP AND HOLD ON THE LOOP REGION to drag the entire region. DOUBLE TAP ON THE LOOP REGION to set the editor's selection to the loop region. |
|
FOLLOW BUTTON |
When enabled, the sample editor will automatically scroll its view to keep the current play position visible. |
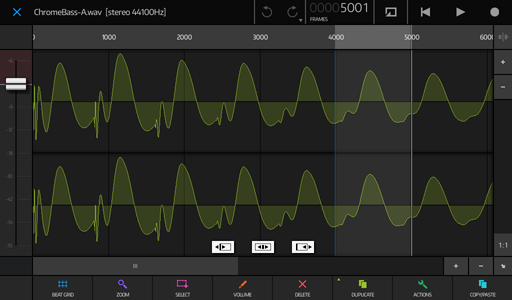
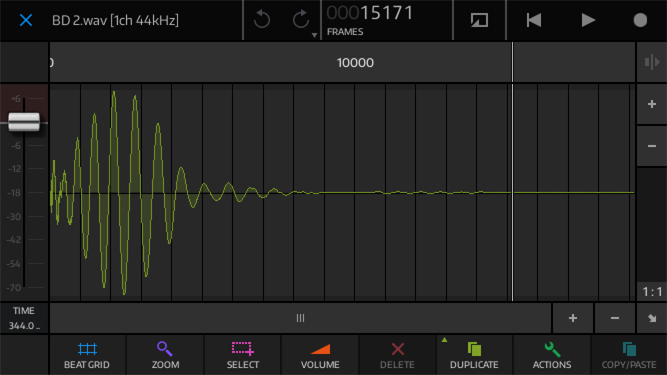
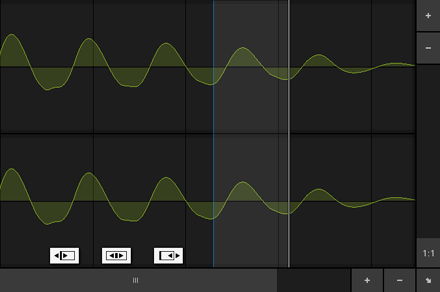
Use the editing window to navigate the view and make selections.
Navigation and selection can be performed with the traditional DRAG and PINCH ZOOM actions, but you will often find that the SELECT and ZOOM command buttons are a more efficient way to achieve these operations in a more task-oriented manner.
 |
SCROLLING - Use two fingers to PINCH ZOOM, and then release one finger and drag. Alternatively, you can use the horizontal scrollbar. ZOOMING - Use two fingers to PINCH ZOOM. You can perform a context-sensitive zoom by double tapping the ZOOM command button. Use the VERTICAL SCROLLBAR to magnify the waveform. DRAG to make a selection and then use the white drag handles to fine tune it. DOUBLE TAP to select all. |
Use the command buttons to set beat grid properties, perform task-oriented zoom/selection and edit the selected region of the sample.

| BEAT GRID | TAP to view or change the grid and snap options - also see the Grid Units Dropdown for setting up the correct beat tempo and time signature if you want to work in beats. DOUBLE TAP to toggle the grid snap on or off. |
| ZOOM | TAP to zoom on a specific area of the sample. DOUBLE TAP to perform a context-sensitive zoom. DOUBLE TAP AGAIN to revert to the previous zoom. |
| SELECT | TAP to select a specific area of the sample. You can also DOUBLE TAP on the editing window to select the entire sample. |
| VOLUME | Performs volume operations on the current selection such as mute, normalize and fade in/out. |
| DELETE | Deletes the current selection. |
| DUPLICATE | Duplicates the current selection. TAP AND HOLD for more options, such as making multiple duplicates. |
| ACTIONS | Performs general editing actions on the current selection such as trimming, reversing and removing DC offsets. Use SAVE SEL to save the current selection as a new sample file. If there is no selection then the entire sample may be saved using SAVE AS. DOUBLE TAP to perform a TRIM operation on the current selection. |
| COPY/PASTE | Copy, cut and paste regions of the sample. |